Last Updated on September 27, 2025 by Gill
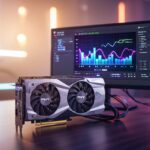
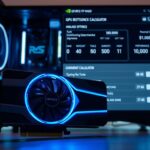
Could a quick check of your PC parts unlock smoother gaming and faster creative work? This guide shows how a dedicated tool can map your cpu, gpu, memory, storage, and monitor to a clear compatibility result. You get a simple status like Good, Excellent, or Needs Improvement so you stop guessing what limits overall performance.
Enter labeled fields — Processor, Graphics Card, Screen Resolution, Purpose — and the calculator compares your specs to live hardware baselines and thermal profiles. It returns a bottleneck percentage, an overall performance score, and tailored upgrade tips. The tool also flags airflow and cooling risks that can mimic slowdowns over time.
Key Takeaways
- The tool diagnoses where your system holds back the graphics card and why.
- Results show compatibility, a bottleneck percent, and clear upgrade steps.
- Easy inputs and live data make testing fast and reliable.
- Cooling and storage speed are included to spot hidden issues.
- Re-run checks after driver updates or new games to stay optimized.
What the RTX 3070 Bottleneck Calculator Does and Why It Matters
In seconds, the system analyzes your hardware and usage to show which component limits frame rates or export times.
The bottleneck calculator scans CPU-GPU pairing, RAM, storage, and thermal risks that many tools miss. It uses real benchmark data to flag performance issues before they spoil gameplay or deadlines.
How it works for your system
Enter Processor, Graphics Card, Screen Resolution, and Purpose. The calculator projects likely FPS and export speed by comparing your inputs to aggregated test data.
- Scope: Finds where the system is constrained so you can act fast.
- Inputs: Pair your cpu gpu, resolution, and tasks for tailored results.
- Outputs: Compatibility label, overall performance score, and a bottleneck percentage with upgrade tips.
| Component | Checked | Why it matters |
|---|---|---|
| CPU | Yes | Limits low-res frame pacing and export times |
| GPU | Yes | Drives high-res framerate and visual quality |
| RAM/Storage | Yes | Affects load times and streaming stability |
“Balanced cpu gpu pairing prevents wasted power and keeps systems responsive.”
Even a midrange rtx 3060 with an older processor can show limits. Use the results to reduce stutter, improve frame pacing, and make smarter hardware choices.
How to Use the Bottleneck Calculator for Your RTX 3070
Collecting accurate specs first makes the rest fast and useful.
Gather your specs: Open Task Manager (Ctrl+Shift+Esc) or CPU‑Z to record your cpu model, core/thread count, clock ranges, gpu model and VRAM, RAM size and speed, storage type, and screen resolution.
Enter details: In the clean input fields select Processor, Graphic Card, Screen Resolution, and Purpose. Double-check exact model names so the calculators match against known baselines.
Review outputs
Submit and read the compatibility status, overall performance score, and the bottleneck percentage.
“Accurate inputs give actionable advice — small setting changes often beat early upgrades.”
| Step | Action | Why it matters |
|---|---|---|
| 1 | Capture CPU/GPU/RAM | Validates core counts and VRAM for predictions |
| 2 | Select Resolution & Purpose | Aligns results to real stress levels |
| 3 | Submit & Save Results | Provides a snapshot to track improvements |
Interpret bands: 0–5% = well‑balanced, 5–10% = minor, 10–50% = significant, 50%+ = critical. Use the tool’s advice to tweak settings or plan upgrades based on your budget and goals.
rtx 3070 bottleneck calculator: Quick Start Checklist
Use a preset to match your play style and get clear CPU/GPU load estimates fast.
Gaming presets: resolution, refresh rate, graphics settings, game type
Pick a gaming preset: choose Resolution (1080p/1440p/4K), Refresh Rate (60/144/240Hz), Graphics Settings (Low/Medium/High/Ultra), and Game Type (esports, AAA, sim).
The tool returns key outputs: CPU Bottleneck %, GPU Bottleneck %, and estimated Avg/Max FPS. It also gives optimization recommendations and a hardware matching reference for balanced builds.
- Use presets to mirror how you play so fps and frame rates estimates stay realistic.
- Review CPU vs GPU load to see which side limits your target fps and adjust settings.
- Align refresh rates to achievable fps to reduce tearing and improve feel.
- Apply suggested tweaks (shadows, ray tracing, or other heavy effects) to hit your goals.
- Save favorite presets so you can re-check after driver or game updates.
“Accurate presets speed up tuning and make upgrade choices much clearer.”
| Preset | Outputs | Why it helps |
|---|---|---|
| Esports / 1080p / 240Hz | High Avg FPS / Low CPU % | Shows settings for max responsiveness |
| AAA / 1440p / 144Hz | Balanced Avg/Max FPS | Guides a mix of quality and speed |
| Sim / 4K / 60Hz | GPU Heavy / Lower Avg FPS | Highlights CPU intensity and thermal needs |
Tip: Run the calculator after each major title change. Different games stress the system in different ways, so iterate per title for the best results.
Understanding Bottleneck Percentages and What Your Result Means
Your percent score turns raw hardware data into a quick health check for real-world use.
Interpretation ranges: 0–5% is well‑balanced; 5–10% shows minor issues that small tweaks can fix. A 10–30% range signals a mild problem—try CPU overclocking or lower CPU‑bound settings first. Results near 50% point to a major imbalance and likely need an upgrade.
How this maps to symptoms: higher percentages often match stutter, uneven frame pacing, and occasional low frame or low frame rates in demanding scenes. The visual health meter in the tool also flags whether the cpu or gpu limits performance based on resolution and workload.
- Healthy: under 10% — system is well matched; tuning is optional.
- Moderate: 10–30% — usually CPU limits at 1080p or GPU at higher resolutions; adjust settings first.
- Severe: 30–50%+ — plan targeted upgrades for the limiting side.
Tip: check thermals before acting. Throttling can inflate your percent. Apply one change at a time and re-run the test so the results reflect real improvement. Use the percentage alongside live FPS and frametime logs to guide final choices.
“Treat the percent as guidance — pair it with in-game telemetry to prioritize the right fixes.”
CPU Bottleneck with RTX 3070: Symptoms, Causes, Fixes
When frame times spike and the processor is pegged, the game is being held back by the CPU. This shows up as near 95–100% CPU use while the GPU idles in heavy titles like Microsoft Flight Simulator.
 under high load, surrounded by a hazy, blurred background. The CPU chip is rendered in intricate detail, showcasing its complex architecture and heat sinks. The overall lighting is slightly dim, casting shadows and highlights that accentuate the CPU's components. The scene conveys a sense of strain and performance limitations, suggesting the CPU is being pushed to its limits, potentially causing a bottleneck in the system's overall performance.")
Spot the signs: high CPU usage with low GPU utilization, stutter, and weak 1% lows—common in simulation and strategy scenarios.
Common root causes
- Limited core or thread count and older architectures (for example older Intel i5 models).
- Low clocks, small cache, or thermal throttling from poor cooling.
- Background apps, overlays, or updaters consuming CPU cycles.
Practical fixes
- Close resource‑hungry apps and trim overlays before running the game.
- Lower CPU‑bound settings: draw distance, shadows, crowd density, and simulation detail.
- Improve cooling: clean dust, repaste if needed, and tune fan curves to avoid throttling.
- Consider safe overclocking when temps and voltages allow modest gains.
- Plan upgrades if needed: moving from an i5‑9400F class chip to a modern i7 can restore balanced performance.
- Update BIOS and chipset drivers, then re-run the calculator and monitor frametimes to confirm improvement.
“Small settings and cooling wins often outpace early hardware upgrades.”
GPU Bottleneck with RTX 3070: When the Graphics Card Is the Limit
If your GPU runs at or near 100% while frame rates stay low, the graphics card is usually the limiting factor.
Spotting the pattern: you’ll see maxed GPU utilization, stuttery frames, and VRAM warnings in demanding titles or at higher resolution. This often shows up at 1440p and 4K or when ray tracing is enabled.
How to fix it
- Recognize the cue: near‑100% GPU use with low fps points to the graphics card as the immediate limit.
- Tune settings: drop ray tracing, SSR, and heavy AA first; lower textures and shadows if VRAM is saturated.
- Use upscalers: enable DLSS or FSR to boost fps while keeping perceived quality, especially at 1440p/4K.
- Improve cooling: check fan curves, clear dust, and avoid thermal throttling during long sessions.
- Check power: confirm PSU wattage and cabling to prevent instability under peak draw.
- Validate changes: re-run the tool and monitor frame pacing to confirm smoother performance.
“If adjustments still fall short, plan for more headroom or adjust your target to match your monitor’s refresh.”
RAM and Storage: Hidden Bottlenecks That Hurt Frame Rates and Load Times
Behind smooth gameplay are balanced memory channels and fast storage that feed the cpu and gpu without delays.
Insufficient memory or a slow drive can create a silent bottleneck that drags overall performance. Dual‑channel kits and enabling XMP/EXPO let RAM run at rated speeds, reducing latency and improving minimum frame rates.
What to check and why it matters
- Capacity: 16–32GB is the sweet spot for gaming and content work; low RAM forces paging and stalls the processing unit.
- Channels & speed: Dual‑channel matched kits beat single sticks for lower latency and steadier frames.
- Drive type: HDD
- Free space: Keep SSDs under ~80% used to preserve sustained write speed.
| Component | Effect | Action |
|---|---|---|
| Memory (single stick) | Higher latency, lower minimum FPS | Install matched kit, enable XMP/EXPO |
| DDR4 vs DDR5 | DDR5 = higher bandwidth; DDR4 still solid | Choose based on motherboard and cpu support |
| Storage tier | Load times and streaming performance | Use NVMe for primary library; SATA for bulk storage |
“Small memory and storage upgrades often deliver the biggest real‑world gains for load times and responsiveness.”
Screen Resolution and Refresh Rate: How They Shift CPU vs. GPU Load
Your display settings often decide whether the cpu or gpu works harder in games.
At 1080p the processor usually shows its limits first. Lower resolutions raise frame rates, which can expose CPU‑bound behavior in many titles.
At 1440p and 4K the graphics card takes most of the load. Higher pixel counts push the gpu harder and often flip the system’s performance balance.
Practical tips to match display targets
- Understand scaling: lower resolution (1080p) tends to expose cpu ceilings; 1440p/4K shifts work to the gpu.
- Align targets: pick a refresh rate your system can sustain to keep frame pacing smooth in fast games.
- Use adaptive tech: G‑SYNC or FreeSync eases perceived stutter when frame rates fluctuate below the panel max.
- Tweak intelligently: at 1080p lower CPU‑heavy settings; at higher resolution trim GPU‑heavy effects first.
- Monitor frametimes: spikes reveal hidden imbalance and explain sudden low frame rates.
| Scenario | Likely Limit | Best First Fix |
|---|---|---|
| 1080p / 144Hz | CPU | Lower draw distance, crowd density; close background apps |
| 1440p / 144Hz | GPU | Reduce ray tracing, textures, enable upscaling |
| 4K / 60Hz | GPU | Use DLSS/FSR or lower native resolution |
“Match your monitor to achievable frame rates — it reduces microstutter and delivers a smoother feel.”
Benchmarking and Monitoring Tools That Pair with the Calculator
Good testing starts with repeatable scores and live telemetry so you can trust the results.
Run synthetic and in‑game benchmarks to validate the performance estimates the tool gives you. Use 3DMark Time Spy for GPU stress, Cinebench for CPU load, and UserBenchmark to compare your computer against common baselines. These tests create clear data you can compare before and after tweaks.
Live telemetry and parts verification
Record temps, clocks, and utilization with MSI Afterburner and HWMonitor while you run a real game or video export. Capture component details with CPU‑Z and GPU‑Z so the results match your hardware profile.
Best practices for reliable results
- Update GPU and chipset drivers before testing to avoid false performance issues.
- Combine synthetic runs with in‑engine scenes to get a well‑rounded view of system behavior.
- Log fps and thermal data, then save baseline scores to measure gains after changes.
- Check storage throughput—slow streaming can skew in‑game stability and rates.
- If scores stray from expected norms (for example an rtx 3060 class card), recheck power, drivers, and settings.
| Tool | Primary Use | What to Record |
|---|---|---|
| 3DMark Time Spy | GPU synthetic | GPU score, frame rates, temps |
| Cinebench | CPU multi/single core | CPU score, clock stability, temps |
| MSI Afterburner + HWMonitor | Live telemetry | FPS logs, voltages, temps, utilization |
| CPU‑Z / GPU‑Z | Component info | Model, clock, memory specs |
“Use combined test data and live telemetry to feed the calculator for clearer upgrade advice.”
Interpreting Compatibility and Performance Scores for the RTX 3070
A concise label and score make it easy to turn test data into practical steps.
The tool issues a compatibility label (Good, Excellent, Needs Improvement), an overall performance score, and a bottleneck percentage. Use these elements together to decide whether to tweak settings or plan upgrades.
Good usually means minor tuning will raise performance. Excellent signals a well‑matched system with little to change. Needs Improvement flags a mismatch that often needs targeted hardware work.
Turn labels into actions
- Read the label as guidance: small optimizations first for Good, larger steps for Needs Improvement.
- Tie the overall performance score to concrete steps: modest gaps → settings changes; large gaps → component upgrades.
- Map the focus: the result shows whether the cpu or gpu limits you so you act precisely.
- Check core use and thermals before swapping parts; overheating or power issues can skew results.
- Validate changes with fps and frametime logs and re-run the calculator so results reflect real gains.
“Use the score and label together, then iterate one change at a time and save each result to track progress.”
Real-World Scenarios: From Low Frame Rates to Smooth Gameplay
Real upgrade stories show how targeted changes move a system from choppy play to steady frame rates.
CPU swap example: moving from a Ryzen 5 2600 to a Ryzen 5 5600X removed an estimated ~25% cpu limit. That upgrade improved FPS and consistency when paired with a high‑end gpu.
Memory and storage wins: boosting memory from 8GB to 32GB and enabling XMP removed stutter in large games. Switching an HDD to an NVMe SSD cut level loads and asset streaming delays dramatically.
Practical fixes that helped users
- Fix low frame rates: upgrade older midrange cpus to newer architectures for steadier performance.
- Boost memory: 32GB kits reduce hitching when multiple apps and games run.
- Accelerate storage: NVMe drives speed load times in open‑world titles.
- Improve cooling: a budget tower cooler stabilizes clocks and prevents thermal limits in prebuilts.
- Balance the build: similar lessons apply to an rtx 3060 pairing—mismatched parts create the same bottlenecks.
“Before/after benchmarks confirm gains — so test, document, and repeat.”
| Problem | Action Taken | Result |
|---|---|---|
| CPU‑limited frames | Upgrade Ryzen 5 2600 → 5600X | ~25% fewer cpu limits, smoother FPS |
| Stutter & hitches | 8GB → 32GB + XMP | Eliminated mid‑session hitching |
| Long load times | HDD → NVMe SSD | Faster level loads and streaming |
| Thermal throttling | Better cooler / airflow | Stable clocks, improved sustained performance |
Verify changes: always run before/after benchmarks and monitor temps. Check background tasks and BIOS updates too. Document what worked so you can apply the same fixes to another computer later.
Step-by-Step Optimization: From Software Tweaks to Hardware Upgrades
Start with the easiest wins first — they often save time and money.
Start by clearing software clutter and updating key drivers to unlock immediate gains in frame rate and stability.
Immediate wins
- Close background apps: shut browsers, launchers, and overlays before gaming.
- Update drivers: install the latest GPU and chipset updates for compatibility and fixes.
- Tune settings: lower CPU‑bound options like shadows or crowd density, and cut heavy GPU effects such as ray tracing or high AA when needed.
Thermals matter
Improve airflow by organizing cables and adding intake or exhaust fans. Clean dust from filters and heatsinks to stop throttling.
Upgrade cooling: a quality tower cooler or AIO keeps boost clocks steadier during long sessions.
Targeted upgrades
- Pair a modern cpu with your gpu class to avoid a new limiting side.
- Match texture and RT settings to the card’s VRAM to prevent paging and stutter.
- Choose a reputable 80+ Bronze/Gold PSU with 100–200W headroom to avoid power‑related slowdowns.
“Stage upgrades: fix the worst constraint first, then validate gains with benchmarks and telemetry.”
| Action | Why it helps | Quick check |
|---|---|---|
| Close background apps | Frees CPU cycles and RAM | Task Manager shows lower CPU use |
| Improve airflow | Prevents thermal throttling | Lower sustained temps during gameplay |
| Right‑size PSU | Stable power under peak draw | No crashes under load |
Use the tool to confirm each change reduces the limiting side and raises effective performance. Benchmark after each step so results tell the true story.
Advanced Features That Set Modern Bottleneck Calculators Apart
Modern tools do more than score your rig—they guide your next move.
Personalized upgrade advice turns raw inputs into a prioritized plan. These calculators weigh CPU, GPU, RAM, storage, thermals, and PSU to suggest the most cost‑effective fixes first.
Standout capabilities
- Tailored guidance: a smart calculator ranks changes so you know which upgrade nets the best performance lift.
- Future readiness: checks warn if your system will limit next‑gen GPUs, faster storage, or higher refresh displays.
- Game‑specific fps estimates: see projected frame rates for popular titles at your chosen settings.
- Broader coverage: analysis includes RAM timings, storage throughput, thermal headroom, and PSU headroom.
- Mobile and real‑time: use on the go and refine results with live temps and clock data.
“Good tools turn scattered data into a clear upgrade path and realistic expectations.”
| Feature | What it does | Why it helps |
|---|---|---|
| Tailored advice | Prioritizes upgrades by ROI | Saves money and improves performance fast |
| Future‑readiness check | Tests upgrade headroom | Prevents platform mismatch later |
| Game fps projection | Estimates frame rates per title | Sets realistic expectations for play and video capture |
| Live telemetry | Uses temps and clocks | Refines advice to match real conditions |
Specialized Calculator Modes for Different Tasks
Pick a mode that matches your workload and the tool simulates real use so you can see which parts strain first.
The streaming profile models OBS or Streamlabs load and shows extra cpu and gpu demand while you play. It also helps tune encoder, bitrate, and capture settings so live video does not wreck frame pacing.
The creative preset tests timelines and long renders. That reveals whether the processing unit or the graphics card limits export speed and multitask performance.
The AI/ML mode evaluates tensor and accelerator workloads. It identifies when a dedicated accelerator or a stronger gpu will cut training and inference times.
Finally, the laptop evaluation factors in thermal throttling and battery limits. Mobile power caps change recommendations compared to desktop builds.
What each mode checks
- Streaming: encoder load, OBS/Streamlabs overhead, and capture bitrate impact.
- Creative: core utilization, sustained clocks, memory use during long exports.
- AI/ML: tensor throughput, VRAM needs, and accelerator fit.
- Laptop: thermal headroom, power profile, and battery versus performance tradeoffs.
“Switch profiles to compare how your system behaves across different real-world tasks.”
| Mode | Main Focus | Typical Limiting Component | Quick Fix |
|---|---|---|---|
| Streaming | Live video capture + gameplay | CPU or GPU encoder | Use NVENC/HEVC, lower bitrate or resolution |
| Creative | Timelines and long exports | Processing unit (CPU) or GPU for effects | Increase cores or enable GPU render, add RAM |
| AI/ML | Tensor ops and model training | GPU or accelerator | Use dedicated accelerator or larger VRAM card |
| Laptop | Portable workloads under thermal limits | Thermals and power | Lower sustained clocks, improve cooling, plug in power |
Make Bottleneck Checks Part of Regular PC Maintenance
A short seasonal test can reveal creeping issues from heat, dust, or aging components.
Keep routine checks to protect long‑term system performance. Run the calculator after big driver or game updates and when you install new software. Compare results over time so you spot declines early.

Seasonal checks and tracking
Schedule checks: reassess system performance each season or after major updates to catch new bottleneck trends.
Track aging: log benchmark scores and FPS to see if hardware drifts, which can point to cooling or power issues.
Verify with data and benchmarks
- Pair calculator outputs with 3DMark or Cinebench to confirm findings.
- Maintain storage health: monitor SSD capacity and write health to avoid creeping slowdowns.
- Keep firmware updated: BIOS and GPU firmware fixes often restore stability and efficiency.
- Watch thermal patterns: rising temps over time usually explain sudden performance drops.
“Small, regular checks save time and money by finding the true limiting factor before you buy new parts.”
Conclusion
Wrap up: use the structured tool and its compatibility labels to align CPU, GPU, RAM, storage, and display so your overall performance improves and the system runs smoother.
Apply the recommended tweaks, then verify gains with repeatable tests and frametime logs. That approach reveals why you see a low frame moment or other performance issues and shows real changes in rates.
Be pragmatic: prioritize the limiting component—whether the cpu or the gpu—and confirm results before buying parts. Regular checks with bottleneck calculators and benchmarks keep your setup tuned for each new game and driver update. End with data, not guesswork.
FAQ
What does the RTX 3070 bottleneck calculator do and why should I use it?
Which specs do I need to enter for an accurate result?
How does resolution and refresh rate affect whether my CPU or GPU is the limiter?
What do bottleneck percentages mean in the results?
What are common symptoms of a CPU limiting my frame rates?
What steps fix a CPU-induced performance problem?
How do I tell if the graphics card is the bottleneck?
What fixes help when the GPU is the limiting factor?
Can RAM or storage cause low frame rates or slow load times?
Which monitoring and benchmarking tools should I use alongside the calculator?
How precise are the compatibility and performance scores?
Does the calculator offer game-specific advice or future-proofing guidance?
Should I check for bottlenecks regularly or only when problems appear?
Will changing in-game settings be enough, or do I need new hardware?
How do streaming and recording affect my CPU/GPU balance?
Can thermal issues mimic bottlenecks?
Where can I get reliable upgrade recommendations based on results?

Follow Gill for the latest tips on CPU/GPU balance, PC upgrade guides, and hardware troubleshooting.Gill is the founder of PC Bottleneck Calculator, a free online tool designed to help users identify and fix performance issues in their PC builds. With years of hands-on experience in computer hardware and system optimization, Gill is passionate about making complex tech concepts simple and accessible for everyone—from beginners to gamers and PC builders. His mission is to help users get the most out of their systems through smart analysis and expert insights.
Follow Gill for the latest tips on CPU/GPU balance, PC upgrade guides, and hardware troubleshooting.
- NVIDIA RTX 6000 Ada Generation 48 GB Bottleneck Calculation - October 17, 2025
- Optimize Your GeForce RTX 5070 Performance with Our Bottleneck Tool - October 2, 2025
- GeForce RTX 5090 Bottleneck Calculator: Optimize Your Setup - October 1, 2025