Last Updated on August 7, 2025 by Gill
Remember that moment when your favorite game stuttered during a critical battle? Many of us have felt the frustration of hardware limitations holding back our gaming experiences. What if you could squeeze 15-20% more performance from your existing setup? That’s the magic of optimizing your graphics hardware.
Modern components often have untapped potential waiting to be discovered. While today’s graphics cards deliver impressive out-of-the-box performance, strategic adjustments can help you maximize every frame without costly upgrades. This approach isn’t just about raw power – it’s about building a deeper connection with your gaming machine.
Our guide focuses on safe, effective methods to enhance visual performance. You’ll learn how to balance clock speeds with thermal management, understand voltage adjustments, and monitor stability. We prioritize practical results over technical jargon, ensuring you gain real-world benefits whether you’re battling in competitive esports or exploring open-world adventures.
While newer models boast improved efficiency, there’s still value in optimizing current hardware. We’ll help you assess if this process suits your needs, discuss achievable performance gains, and share pro tips to avoid common pitfalls. Let’s transform your gaming experience together – one carefully calibrated setting at a time.
Understanding Overclocking and Its Benefits
Imagine breathing new life into your gaming setup without swapping hardware. That’s the core promise of modern graphics optimization. By pushing components beyond factory settings, you unlock hidden reserves that smooth frame drops and sharpen visual details.
What Makes Graphics Optimization Work?
Adjusting clock speeds through software remains the simplest way to enhance visual output. Unlike older models, today’s cards come finely tuned from manufacturers. Yet even automated boost algorithms leave room for manual tweaks. This process balances thermal limits with raw power, letting you customize performance for specific games or apps.
Real-World Advantages for Players
Optimized settings deliver tangible upgrades. Expect smoother gameplay at higher resolutions and extended hardware relevance. While gains vary by model, most users see 5-15% better frame rates – enough to transform choppy scenes into buttery-smooth action.
| Scenario | Stock Performance | Optimized Settings |
|---|---|---|
| 1080p Gaming | 60 FPS | 68-72 FPS |
| 4K Rendering | 24 FPS | 27-29 FPS |
| VR Experiences | Medium Settings | High Settings |
This table shows typical improvements across common use cases. Remember – effective optimization isn’t about chasing benchmarks. It’s about crafting personalized performance that matches your gaming style.
Preparing Your AMD GPU for Overclocking
Unlocking your graphics card’s full potential starts with proper groundwork. While performance gains can be exciting, stability and safety should always come first. Let’s explore the essential steps to create a solid foundation for your optimization efforts.
Hardware Prerequisites and Safety Measures
Not all graphics cards are created equal when it comes to customization. First, confirm your specific model allows frequency adjustments – many entry-level options have locked settings. Manufacturers often limit this capability on budget-friendly or prebuilt system components.
Power delivery becomes critical when pushing hardware limits. Your computer’s PSU needs extra headroom to handle increased energy demands. A quality unit with proper connectors prevents crashes and maintains stability during intense gaming sessions. Additionally, choosing a PSU with an efficiency rating of at least 80 Plus Gold ensures that your system utilizes energy effectively while minimizing waste and heat generation. This hidden power in gaming rigs not only supports optimal performance but also extends the lifespan of your components, allowing for smoother gameplay and future upgrades. Investing in a robust power delivery system is essential for any serious gamer looking to push their setup to the limits.
Thermal management separates successful tweaks from overheating disasters. Aim for temperatures below 85°C during normal use before making changes. If your case struggles with airflow, adding exhaust fans helps maintain optimal operating conditions.
While motherboard support isn’t always mandatory, a robust board with clean power delivery enhances overall system reliability. Remember: every component works together when pushing performance boundaries. Research your exact card model to set realistic expectations and learn from others’ experiences.
Patience proves vital in this process. Small, incremental adjustments paired with thorough testing yield better results than aggressive changes. Always monitor temperatures and performance metrics to ensure safe operation throughout your optimization journey.
Customizing Graphics Performance: A Methodical Approach
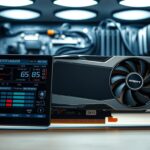
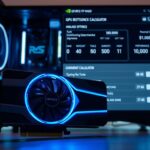
 undergoing the overclocking process. The GPU is prominently displayed in the foreground, its intricate heatsink and fan assembly illuminated by warm, focused lighting. The surrounding components, such as the motherboard and other internal parts, are slightly blurred in the middle and background, creating a sense of depth and emphasis on the GPU. Technical details like voltage and frequency settings are visible on a digital display, conveying the precise, technical nature of the overclocking procedure. The overall atmosphere is one of concentration and technical precision, reflecting the meticulous process of optimizing the GPU's performance.")
Fine-tuning your graphics hardware demands equal parts caution and curiosity. Let’s walk through a systematic method to enhance performance while maintaining stability.
Gradual Tuning for Optimal Results
Begin by sliding the power limit to its maximum in your control software. This creates thermal breathing room without immediate risks. Next, boost clock speed in 25-50 MHz increments – small jumps help identify stability thresholds faster.
Follow this pattern after each adjustment:
- Save modified parameters
- Run 30-minute stress tests
- Monitor for visual anomalies
Encounter crashes or artifacts? Dial back frequencies by 25 MHz and retest. For persistent issues, nudge voltage upward in 25mV steps. Remember – higher voltages mean more heat generation.
Measuring Progress Effectively
Establish clear metrics before making changes. Popular benchmarking tools provide:
- Baseline frame rate averages
- Temperature profiles
- Performance consistency scores
Document every successful configuration. This creates a safety net if you need to backtrack and helps identify patterns in your hardware’s behavior. Through gradual adjustments and careful monitoring, you’ll discover your card’s sweet spot between performance gains and operational stability.
Essential Tools and Software for Overclocking

Choosing the right software transforms technical adjustments into seamless upgrades. Modern solutions balance power with simplicity, letting you focus on results rather than complex settings.
MSI Afterburner Features and Alternatives
MSI Afterburner remains the gold standard for enthusiasts. Its dashboard provides granular control over clock speeds, voltage adjustments, and fan curves. The software works with most graphics cards, making it a versatile option across different setups.
Key features include:
- Real-time performance monitoring
- Customizable on-screen displays
- Profile saving for different games
Official Overclocking Tools from AMD and Nvidia
Manufacturer-specific apps offer tailored experiences. AMD’s Radeon Software includes three automated modes:
| Mode | Function | Benefit |
|---|---|---|
| Undervolt | Reduces power draw | Cooler operation |
| Overclock | Boosts core speed | Higher FPS |
| VRAM Tuning | Enhances memory | Smoother textures |
Nvidia’s GeForce Experience provides similar tools through its performance tab. Both companies update their software regularly, ensuring compatibility with new game releases. Third-party programs like GPU Tweak II work well for specific needs, but official versions often deliver better stability.
Always download tools from verified sources to avoid security risks. Test different options to find what feels intuitive – the best software is the one you’ll use consistently.
Tips and Best Practices for a Stable Overclock
The real test begins after adjusting your card’s parameters. Achieving lasting stability requires patience and precise validation methods. Let’s explore techniques that help maintain smooth operation while pushing hardware boundaries.
Stress Testing and Monitoring Stability
Extended testing sessions reveal hidden issues synthetic benchmarks might miss. Tools like 3DMark Time Spy simulate intense workloads, while real-world gaming sessions expose sudden spikes in resource demand. Always track temperatures during these trials – consistent readings above 85°C signal cooling challenges.
| Test Duration | Recommended Tools | Key Observations |
|---|---|---|
| 30-60 minutes | FurMark, Unigine Heaven | Initial stability checks |
| 2-4 hours | Multiple game sessions | Thermal throttling patterns |
| 24+ hours | Custom stress loops | Long-term reliability |
Document successful configurations systematically. This log becomes invaluable when:
- Troubleshooting unexpected crashes
- Comparing performance across titles
- Creating custom profiles
Balance remains crucial. Some users prefer slightly lower frequencies for quieter operation during streaming or content creation. Remember – identical models can behave differently due to manufacturing variances. What works for others might need adjustment for your specific setup.
Finalize your configuration by testing across various scenarios. Save multiple profiles for different use cases, ensuring optimal performance whether you’re battling in competitive matches or enjoying cinematic adventures.
Troubleshooting Common Overclocking Issues
Even careful adjustments can sometimes lead to unexpected hiccups. Recognizing warning signs early helps maintain both performance and hardware health. Let’s explore solutions for common stability issues during graphics customization.
Spotting Unstable Configurations
Visual anomalies like rainbow-colored pixels or screen tearing often appear first. These artifacts signal your settings exceed the card’s stable limits. Immediate action prevents potential long-term damage to components.
Black screens during gameplay usually mean excessive clock speeds. Dial back frequencies by 50-75 MHz and retest. If crashes persist, check your power supply capacity – insufficient wattage causes sudden shutdowns under load.
Balancing Performance and Safety
Thermal management becomes critical when pushing hardware boundaries. Improve airflow or adjust fan curves if temperatures exceed 85°C. Cards that support voltage tweaks might need small boosts (25mV increments) for stability.
Stuttering after smooth gameplay often indicates memory issues. Reduce VRAM speeds slightly while monitoring frame consistency. Document successful configurations for different games – every title stresses components uniquely.
Remember: stable overclocks require patience. Test each change across multiple sessions before finalizing. Your specific model might behave differently than others, so prioritize gradual adjustments over drastic jumps.
FAQ
Is overclocking my Radeon GPU safe?
What software works best for AMD GPU overclocking?
How do I know if my overclock is stable?
Can overclocking void my GPU warranty?
Why does my screen flicker after overclocking?
Do I need better cooling for overclocked GPUs?
Are Nvidia and AMD overclocking tools different?
How much performance gain can I expect?

Follow Gill for the latest tips on CPU/GPU balance, PC upgrade guides, and hardware troubleshooting.Gill is the founder of PC Bottleneck Calculator, a free online tool designed to help users identify and fix performance issues in their PC builds. With years of hands-on experience in computer hardware and system optimization, Gill is passionate about making complex tech concepts simple and accessible for everyone—from beginners to gamers and PC builders. His mission is to help users get the most out of their systems through smart analysis and expert insights.
Follow Gill for the latest tips on CPU/GPU balance, PC upgrade guides, and hardware troubleshooting.
- NVIDIA RTX 6000 Ada Generation 48 GB Bottleneck Calculation - October 17, 2025
- Optimize Your GeForce RTX 5070 Performance with Our Bottleneck Tool - October 2, 2025
- GeForce RTX 5090 Bottleneck Calculator: Optimize Your Setup - October 1, 2025