Last Updated on August 21, 2025 by Gill
Remember that moment when your computer suddenly sounds like a jet engine during an intense gaming session? I’ve been there too – torn between wanting peak performance and wishing my setup didn’t mimic a helicopter takeoff. That’s when I realized the power of smart thermal management.
Every graphics card thrives on balance. Too little cooling risks thermal throttling, while excessive fan noise can ruin immersion. Modern systems offer clever solutions, letting you tailor cooling behavior to match your needs – whether you’re pushing hardware limits or enjoying casual browsing.
This guide unlocks two approaches: hands-on customization and intelligent automation. We’ll explore tools like GPU Tweak III that transform technical adjustments into simple slider movements. You’ll learn to create profiles that respond to different tasks, from rendering 4K video to streaming your favorite shows.
Safety remains crucial. While tweaking settings feels empowering, understanding your hardware’s limits prevents costly mistakes. We’ll highlight essential precautions so your modifications enhance longevity rather than compromise it.
By the end, you’ll craft a cooling strategy that whispers during Netflix marathons and roars (just enough) when conquering virtual worlds. Let’s turn that disruptive whir into a finely tuned performance companion.
Understanding GPU Fan Speed Control
Balancing your computer’s cooling and noise can feel like walking a tightrope. The right airflow keeps components happy, while excessive whirring turns your workstation into a wind tunnel. Let’s break down what makes these cooling decisions so impactful.
Role of Fan Speeds in Heat Management
Cooling efficiency depends on how well your system moves hot air away from critical parts. Lower rotations per minute (RPM) mean quieter operation but warmer components. Bump up the fan speed, and you’ll hear more noise – though temperatures drop faster than you might expect.
| Fan Speed (RPM) | Average Temperature (°C) | Noise Level (dB) |
|---|---|---|
| 1500 | 75 | 30 |
| 2500 | 65 | 45 |
| 3500 | 55 | 60 |
Performance and Thermal Trade-offs
Graphics cards automatically slow down when hitting temperature limits to prevent damage. This safety feature – called thermal throttling – protects hardware but cuts frame rates during intense tasks. Finding your GPU’s sweet spot lets you maintain smooth performance without constant revving.
Modern systems use smart sensors to adjust cooling based on real-time needs. While gaming might demand max fans, streaming videos could work with near-silent operation. Monitoring tools help identify when manual tweaks outperform automatic settings.
Why GPU Cooling Efficiency is Crucial
Your graphics card works hardest when you’re immersed in breathtaking visuals, but its silent partner – the cooling system – often goes unnoticed until things get too hot. Maintaining peak performance without turning your workspace into a noise factory requires understanding what happens behind the scenes.
Balancing Noise and Thermal Limits
Modern graphics processors generate significant heat under load, especially during 4K rendering or AI tasks. Thermal design power (TDP) specifications reveal how much cooling your card needs to avoid performance drops. Push beyond these limits, and you’ll hear fans spin faster than a caffeine-fueled woodpecker.
Different activities demand unique approaches. Competitive gaming sessions might justify louder operation, while video editing marathons benefit from steadier temperature control. The trick lies in matching cooling intensity to your actual workload – not just maxing out rotations.
Excessive heat shortens component lifespans through thermal stress, while constant high-speed cooling wears out bearings. Smart solutions strike a middle ground, keeping your hardware below critical thresholds without sounding like airport runway operations. Monitoring tools help identify when to prioritize silence or cooling power.
Manual vs. Automatic Fan Speed Control
Silence or performance? The choice isn’t binary with modern thermal solutions. Customization tools let you decide when to micromanage rotations and when to trust smart algorithms.
When Precision Matters
Direct oversight shines in specific scenarios. Content creators often lock rotations at 40% during recordings to eliminate background hum. This control prevents sudden revving when rendering complex scenes, ensuring clean audio capture.
Hardcore overclockers also benefit from fixed settings. Maintaining 70% fan speed during benchmarking creates stable thermal conditions for pushing hardware limits. The trade-off? You’ll need to monitor temperatures like a hawk.
The Smart Default Approach
Most systems work beautifully on autopilot. Built-in profiles gradually increase cooling as heat rises, avoiding jarring noise spikes. This default behavior works perfectly for everyday tasks – your card stays cool without becoming a distraction.
Gaming laptops particularly benefit from automatic modes. Their compact designs require careful heat balancing that manual tweaking might disrupt. Letting the system respond dynamically often yields better longevity and consistent frame rates.
The best setups blend both philosophies. Use locked speeds for critical tasks, then switch to adaptive cooling for general use. Modern software makes this transition seamless – your perfect balance is just a profile away.
Tailoring Your Thermal Management Strategy
Ever wondered why some gaming rigs purr like kittens while others roar like lions? The secret lies in smart thermal configuration. ASUS GPU Tweak III transforms complex adjustments into intuitive slider controls, letting you dictate exactly how your system responds to heat.
Navigating the Control Panel
After installing the software, you’ll find fan speed sliders dominating the right panel. ROG Strix and TUF Gaming models reveal dual controls – one for side blades and another for the reverse-spinning center fan. Single-slider layouts simplify adjustments for standard cards.
Crafting Temperature-Responsive Profiles
Click the pencil icon below the sliders to unlock advanced settings. Here’s where magic happens: drag points on the graph to set fan behavior at specific temperatures. Want near-silent operation at 50°C? Position that point at 30% rotation. Need aggressive cooling at 75°C? Spike the curve to 80%.
Test new configurations gradually. Launch a demanding game while monitoring temps in real-time. If your card stays below throttling thresholds without sounding like a leaf blower, you’ve nailed the balance. Save successful setups as named profiles for quick switching between tasks.
Remember – the Auto button isn’t defeat. It’s a safety net when experimenting. Combine custom curves for intense sessions with default modes for casual use. Your perfect blend of silence and cooling awaits.
Configuring Fan Curves for Optimal GPU Cooling
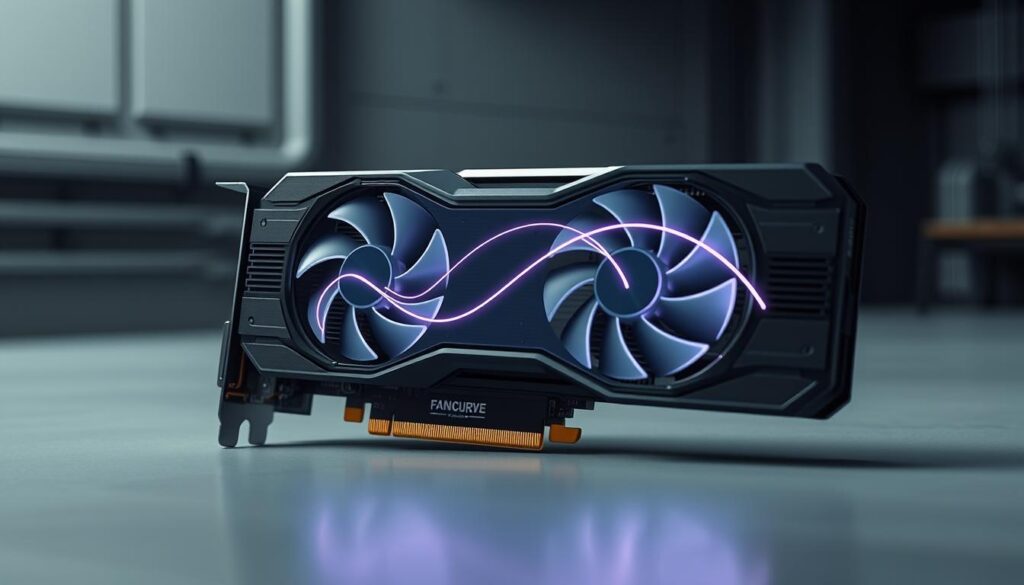
Imagine your graphics card’s cooling system as a precision thermostat. The fan curve editor turns this concept into reality, letting you design temperature-responsive cooling patterns through simple drag-and-drop controls.
Mastering the Curve Editor
Click anywhere on the graph to place control points – these become your thermal decision markers. Drag them vertically to set fan intensity at specific temperatures. A gentle slope keeps noise minimal during web browsing, while a steep climb at 70°C prepares your system for rendering workloads.
Smart Stabilization Settings
Hysteresis acts like a temperature buffer. Set it to 5°C, and your fans won’t rev up until heat increases by that margin – preventing constant speed changes during minor fluctuations. Pair this with response time adjustments to control reaction speed.
Quick updates (2-second intervals) suit competitive gaming where heat spikes suddenly. Slower responses (10 seconds) work better for sustained workloads, reducing bearing wear from frequent adjustments. These twin settings create either razor-sharp responses or smooth transitions between states.
Pro tip: Create multiple curves for different scenarios. Save a relaxed profile for movie nights and an aggressive one for benchmark runs. Your perfect balance between whisper-quiet operation and frosty components lives in these customizable graphs.
Leveraging GPU Tweak III for Fan Adjustments
Modern graphics cards pack serious cooling power, but unlocking their full potential requires more than basic presets. ASUS GPU Tweak III transforms thermal management into an art form, offering granular adjustments that sync multiple cooling elements seamlessly.
Utilizing Multiple Fan Sliders
High-end cards like ROG Strix models feature separate sliders for different fan zones. This lets you direct airflow precisely – maybe push 60% power to side blades while keeping center rotations at 40%. Understanding your GPU’s layout helps maximize cooling where heat builds fastest.
Test different combinations during rendering tasks. Front-loaded workloads might need stronger front fan speeds, while memory-intensive processes benefit from balanced distribution. Save these setups as profiles for one-click optimization later.
Exploiting FanConnect II Features
ROG Strix’s secret weapon? Two extra headers that link case fans directly to your graphics card. These additions appear in GPU Tweak III alongside native fans, creating a unified thermal network.
Set connected fans to mirror your GPU’s temperature instead of CPU metrics. During 4K gaming, they’ll ramp up precisely when graphics heat spikes. This coordination prevents hotspots better than traditional cooling methods.
- Assign intake fans lower curves to maintain positive pressure
- Program exhaust fans for aggressive heat expulsion
- Sync all rotations through a single interface
This ecosystem approach keeps your entire rig cooler, letting you push hardware further without thermal penalties. Smart adjustments turn separate components into a symphony of efficient cooling.
Understanding Hardware Limitations and Safety
Ever tried whispering to your computer only to get a roaring response? Hardware safeguards ensure your cooling experiments don’t turn into meltdowns. These built-in protections act like guardrails, keeping your tinkering within safe boundaries.
Minimum RPM and Temperature Thresholds
Modern graphics cards refuse to play dangerous games. NVIDIA models enforce a 30% minimum fan speed during manual adjustments – no silent suicide missions allowed. This baseline prevents components from baking themselves while you’re just checking emails.
Temperature triggers work behind the scenes too. Fans might completely stop below 45°C on some cards, creating library-quiet environments. But plug in extra monitors? Suddenly that 0 RPM mode vanishes – additional pixels demand constant cooling vigilance.
Safety nets kick in during emergencies. If your card approaches critical heat levels, it overrides all settings like a concerned parent. Manual configurations become suggestions rather than commands when hardware safety is at stake.
Key limitations to remember:
- Multi-screen setups often disable silent modes
- Background processes can trigger unexpected fan spins
- Manufacturer-specific rules vary between brands
Respecting these boundaries helps avoid frustration. Your cooling masterpiece should harmonize with – not fight against – your card’s built-in survival instincts.
Advanced Fan Control Techniques for NVIDIA GPUs
What if your graphics card could decide when to stay silent? NVIDIA’s modern RTX models come with clever safeguards that challenge traditional cooling approaches. These protective measures ensure hardware longevity but require creative solutions for optimal performance.
Silent Operation Within Boundaries
RTX cards enforce a 30% minimum rotation limit during manual adjustments. This safety net prevents dangerous overheating but complicates silent operation. The trick lies in leveraging native 0 RPM modes through smart software configurations.
Third-party tools like MSI Afterburner offer workarounds. Setting a 0% command in your fan curve triggers automatic handoff to NVIDIA’s built-in logic. If temperatures permit, your card enters true silent mode – blades stopping completely during light tasks.
| Temperature (°C) | Fan Speed | Mode |
|---|---|---|
| ≤40 | 0% (Native) | Silent |
| 45 | 30% | Safety Floor |
| 60 | 50% | Balanced |
| 75 | 80% | Performance |
Multi-monitor users face unique challenges. Additional displays often disable 0 RPM eligibility due to increased power draw. Adjust your curve’s low-end threshold higher in these scenarios – maybe 35°C instead of 30°C – to maintain stability.
Content creators can benefit most from these techniques. Configure aggressive cooling during renders, then switch to whisper-quiet profiles for editing. Remember – NVIDIA’s safeguards always override settings if temperatures spike unexpectedly.
Optimizing Fan Control on AMD GPUs
Ever felt your PC’s cooling system has a mind of its own? AMD’s Adrenaline software hands you the reins, but with unique quirks. Unlike other solutions, tweaking thermal settings here might reset your carefully tuned overclocks – a trade-off for precision adjustments.
Mastering the Interface
The Adrenaline dashboard hides its power behind deceptively simple sliders. Third-party tools using AMD’s ALDX protocol can bypass some limitations, but at a cost. Pro tip: Save performance profiles before adjusting fan curves to avoid losing hours of tuning work.
Look for dotted lines in the graph – these mark Zero RPM activation thresholds. Position your curve’s low end above these markers for silent operation during light tasks. Just remember: most AMD cards enforce a 30% minimum fan speed when manually controlled.
Smart balancing involves syncing case airflow with your GPU’s needs. Set intake fans slightly higher than exhaust to maintain positive pressure. This teamwork approach keeps components cooler than solo adjustments, letting your graphics card breathe without shouting.
FAQ
Why is adjusting fan speed important for my GPU?
What’s the difference between manual and automatic fan control?
How do I create a custom fan curve for my GPU?
What is hysteresis in fan curve settings?
Can I override zero RPM modes on NVIDIA cards?
Are there risks to manually setting GPU fan speeds?
How does FanConnect II improve cooling?
Why won’t my AMD GPU let me adjust fan speeds?
What’s the ideal temperature range for a GPU under load?
- NVIDIA RTX 6000 Ada Generation 48 GB Bottleneck Calculation - October 17, 2025
- Optimize Your GeForce RTX 5070 Performance with Our Bottleneck Tool - October 2, 2025
- GeForce RTX 5090 Bottleneck Calculator: Optimize Your Setup - October 1, 2025

