Last Updated on August 7, 2025 by Gill
We’ve all been there – mid-game, heart racing, when suddenly rainbow-colored polygons explode across your monitor. Or maybe you’re editing photos when mysterious lines slice through your masterpiece. These aren’t creative choices – they’re warning signs your hardware is crying for help.
Visual distortions often stem from components working harder than they should. Like a car’s check engine light, strange patterns signal deeper performance issues. Newer systems aren’t immune either – manufacturing quirks can surface when pushing graphical limits.
This guide helps you decode those flickering warnings. We’ll explore why screens go rogue, from temperature spikes to software conflicts. You’ll learn simple checks like adjusting refresh rates alongside advanced techniques for enthusiasts. Most importantly, we’ll show when a quick fix works versus needing professional help.
Our approach focuses on saving your investment first. Many display problems respond well to driver updates or cooling improvements. We’ll also share maintenance tips to keep your rig running smoothly, whether you’re battling virtual enemies or rendering 3D models.
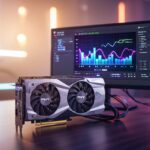
Understanding GPU Artifacting
Picture your screen suddenly sprouting neon squiggles during a heated battle or flickering like a broken neon sign while editing videos. These aren’t just random quirks – they’re your hardware’s distress signals. Recognizing these patterns early can save you from costly repairs or replacements down the line.
What Does Artifacting Look Like?
Visual distortions vary wildly. You might see jagged streaks slicing through images like digital lightning. Some users report rainbow-colored confetti dots clustering in specific screen areas. Others encounter ghostly shapes that vanish when they blink – like 8-bit aliens from classic arcade games.
Common Visual Symptoms: Lines, Dots, and Symbols
Horizontal or vertical bars often appear during system startup. These usually mean your graphics processor is struggling with basic tasks. Clusters of colorful pixels? That’s frequently a VRAM red flag. When surface textures warp into psychedelic patterns mid-game, it suggests communication breakdowns between components.
Subtle flickering might only last seconds, while severe cases can turn displays into abstract art. Pay attention to when issues occur – startup glitches differ from those during video rendering. Tracking these details helps pinpoint whether it’s a software hiccup or hardware crying uncle.
Identifying the Causes Behind GPU Artifacting
Imagine working on a project when your display starts acting like a broken kaleidoscope. Those odd shapes and colors often trace back to three main troublemakers. Let’s break them down before diving into solutions.
When Components Get Too Hot
Heat turns electronics into drama queens. Graphics cards working above 85°C often throw visual tantrums. Dust-clogged fans and cramped computer cases worsen the problem. Old thermal paste can’t transfer heat well, making your card overheat even during light tasks.
Software That Can’t Keep Up
Outdated or buggy graphics drivers create translation errors between your system and hardware. Ever seen glitches only in specific apps? That’s often software fighting over resources. Regular updates prevent most of these digital misunderstandings.
Pushing Limits Too Far
Boosting performance beyond factory settings risks stability. Extra clock speed might deliver smoother frames initially, but eventually leads to scrambled visuals. Even quality components have breaking points when overworked.
| Culprit | Common Signs | Quick Checks |
|---|---|---|
| Overheating | Fans running full speed, distorted textures | Monitor temps during tasks |
| Driver Issues | Glitches in specific programs | Check update history |
| Overclocking | Artifacts under heavy load | Reset to default settings |
| Hardware Defects | Persistent patterns | Test in another system |
Manufacturing flaws sometimes slip through quality checks. VRAM issues might show perfect performance initially, then degrade over months. These hardware gremlins usually need professional attention rather than DIY fixes.
GPU Artifacting: Causes and How to Fix
Unexpected screen distortions often stem from software tweaks or outdated components. Before panicking about hardware failure, try these proven software-based solutions first.

Resetting Clock Speeds and Factory Settings
Overclocking tools like MSI Afterburner make reversing custom settings simple. Locate the reset button in your preferred software – one click restores factory specifications for clock speeds and voltage. For stubborn glitches, try underclocking by 5-10% to reduce component strain.
Updating or Rolling Back Drivers
Display Driver Uninstaller (DDU) wipes outdated or corrupted files completely. Run it in Safe Mode, then install fresh drivers from your manufacturer’s site. If new updates cause issues, roll back to stable versions from previous months.
| Solution | Best For | Time Required |
|---|---|---|
| Factory Reset | Recent overclocking changes | 2 minutes |
| Driver Update | System-wide glitches | 15 minutes |
| Underclocking | Aging hardware | 5 minutes |
| Driver Rollback | New update issues | 10 minutes |
These fixes resolve most software-related visual errors. If problems persist after trying all four methods, deeper hardware checks might be necessary. Keep your system updated and avoid extreme overclocking to maintain smooth performance.
Practical Steps to Fix GPU Artifacting
When strange patterns invade your screen, quick action can save your hardware from permanent damage. Three critical maintenance areas often resolve temperature-related issues before they escalate.

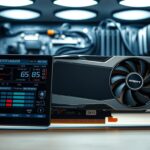
Keep Components Chill
Start by tracking heat levels during intense tasks. Free tools like MSI Afterburner show real-time numbers beside fan speeds. Modern cards handle up to 90°C, but aim for 70-80°C during gaming.
Smart Diagnostics Made Simple
MSI Afterburner isn’t just for tweaking settings. Its monitoring features reveal which apps strain your system. Pair it with HWMonitor for detailed voltage reports across all components.
| Maintenance Task | Essential Tools | Recommended Frequency |
|---|---|---|
| Temperature checks | MSI Afterburner | Weekly |
| Dust removal | Compressed air + brush | Every 3 months |
| Paste replacement | Isopropyl alcohol + thermal paste | 2-3 years |
Refresh Your Cooling System
Power down and unplug first. Gently brush fan blades, then blast compressed air through heat sinks. For cards older than two years, replacing dried thermal paste can drop temps by 10-15°C. Remember – this voids warranties on newer models.
Stubborn heat issues? Improve case airflow by rearranging cables or adding exhaust fans. Sometimes, moving your setup away from walls makes a bigger difference than internal tweaks.
Preventing Future Artifacting and Maintaining GPU Health
Your gaming rig deserves better than a dusty death. Proactive care keeps components humming and screens clear. Let’s explore habits that extend your system’s prime years while avoiding performance-killing mistakes.
Implementing Regular Maintenance Routines
Consistency beats heroic cleanups. Set monthly reminders to wipe fan blades with microfiber cloths. Every three months, blast compressed air through heat sinks – focus on the space between fins where dust hides.
Track temperatures quarterly using free tools like HWiNFO. Compare readings across seasons – summer spikes might demand extra cooling. Replace thermal paste every two years, or sooner if temps climb 10% above normal.
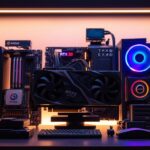
Ensuring Adequate Case Ventilation and Cable Management
Airflow matters more than fancy RGB lights. Position intake fans where cool air enters – front panels work best. Exhaust fans belong near warm zones like your graphics card’s rear.
| Airflow Upgrade | Tools Needed | Impact |
|---|---|---|
| Cable ties | Velcro straps | +15% airflow |
| Fan replacement | Phillips screwdriver | +20% cooling |
| Dust filters | Magnetic mesh | -30% debris |
Top cases from Corsair and NZXT offer modular designs. Their removable panels make routing wires behind the motherboard tray easy. Leave at least two inches between components and case walls for proper circulation.
Remember: Clean systems run cooler. Organized cables prevent hot pockets that strain hardware. Pair smart maintenance with moderate clock speeds for lasting performance.
Conclusion
Staring at distorted screens doesn’t mean game over. Many visual quirks stem from fixable issues like outdated drivers or aging thermal paste. If resetting clock speeds and updating software didn’t help, deeper hardware checks might be needed.
Persistent glitches after troubleshooting often signal component wear. Cards that boot properly but fail under load may still be salvageable. Techs can test VRAM modules and power delivery – repairs cheaper than replacements.
For budget-conscious users, temporary solutions exist. The GTX 1030 handles basic gaming at $100 while you plan upgrades. Always check manufacturer sites for warranty options before opening your hardware.
Remember: Regular maintenance prevents most issues. Clean fans yearly and monitor temperatures during intense tasks. With smart care, your graphics card can outlive its expected lifespan – letting you focus on high scores, not screen errors.
FAQ
Why does my screen show strange lines or symbols during gaming?
Can outdated drivers cause visual glitches on my monitor?
How do I safely reset my graphics card to factory settings?
What’s the best way to clean dust from my video card?
Could poor cable management affect my system’s performance?
When should I seek professional help for hardware issues?

Follow Gill for the latest tips on CPU/GPU balance, PC upgrade guides, and hardware troubleshooting.Gill is the founder of PC Bottleneck Calculator, a free online tool designed to help users identify and fix performance issues in their PC builds. With years of hands-on experience in computer hardware and system optimization, Gill is passionate about making complex tech concepts simple and accessible for everyone—from beginners to gamers and PC builders. His mission is to help users get the most out of their systems through smart analysis and expert insights.
Follow Gill for the latest tips on CPU/GPU balance, PC upgrade guides, and hardware troubleshooting.
- NVIDIA RTX 6000 Ada Generation 48 GB Bottleneck Calculation - October 17, 2025
- Optimize Your GeForce RTX 5070 Performance with Our Bottleneck Tool - October 2, 2025
- GeForce RTX 5090 Bottleneck Calculator: Optimize Your Setup - October 1, 2025