Last Updated on September 1, 2025 by Gill
Want to know which part of your build is holding back smooth frame rates? This short guide shows how a simple tool turns your parts list into clear, actionable steps to boost performance.
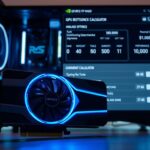
Enter your cpu and gpu models, choose resolution and purpose, and the engine compares benchmarks, thermals, and compatibility. The result is a clear bottleneck percentage, utilization targets, and tailored tweaks you can try today.
The interface is made for all skill levels. Dropdowns and search fields keep setup fast, while advanced toggles let you factor in Ray Tracing, DLSS/FSR, target FPS, and safe OC multipliers.
Whether you game or create, this tool highlights workload share, headroom, and estimated FPS. It points out when your graphics card or processor needs an upgrade and when small tweaks will deliver big gains.
Key Takeaways
- Quick setup: add CPU/GPU, resolution, and use case.
- Gets you a bottleneck percentage and utilization targets.
- Offers practical tweaks before suggesting upgrades.
- Advanced options cover ray tracing, DLSS/FSR, and OC.
- Designed for clear, friendly guidance for all users.
What a Bottleneck Is and Why It Matters for RTX 3060 Ti Owners
A performance choke happens when one part keeps the rest of your PC from reaching its potential. In short, a bottleneck is where one component limits overall performance, and it becomes obvious when a powerful gpu sits beside an older processing unit.
CPU vs. GPU limits — the real-world impact:
CPU vs. GPU limits: the real-world impact on FPS and responsiveness
In games, high CPU usage with low GPU utilization points to a cpu bottleneck. The opposite — GPU near 100% and a light CPU — signals a gpu bottleneck.
This matters because at 1080p the cpu often controls frame pacing and input lag. At higher resolutions the gpu carries more load and frames depend on graphics work.
Hidden culprits: RAM speed, storage, airflow, and thermal throttling
Not all limits are obvious. Slow RAM, old storage, poor case airflow, or thermal throttling can create performance issues that look like a single failing part.
“Use monitoring tools to compare utilization and temps during play to see which processing unit hits 95–100%.”
- Use Task Manager, HWMonitor, MSI Afterburner, CPU‑Z, and GPU‑Z to check loads.
- Benchmarks like 3DMark and Cinebench help contextualize real-world strain.
- Small fixes — cooling, driver updates, RAM config — often clear issues without an upgrade.
Quick takeaway: understanding these factors helps prioritize fixes that improve smoothness on a powerful gpu, so you address the right component first.
Quick Start: Run the 3060 ti bottleneck calculator in Minutes
Ready to see where your PC limits performance? Collect a few simple specs and the tool will return clear, actionable results in under a minute.
Gather essentials fast: open Task Manager (Ctrl+Shift+Esc) to view CPU model, Memory total, and GPU name. Use CPU‑Z to confirm cores, threads, and memory speed. If you need exact graphics details, run GPU‑Z for VRAM and clock info.
Next, enter the cpu, gpu, RAM capacity, screen resolution, and primary tasks (gaming, video editing, streaming) into the online calculator. Hit submit and get a bottleneck score, utilization targets, and prioritized recommendations.
“Save a screenshot of the results so you can compare after tweaks.”
Fast checklist
- Open Task Manager to capture CPU, GPU, and RAM quickly.
- Use CPU‑Z/GPU‑Z to verify cores, threads, memory type, and VRAM.
- Enter specs, select screen resolution and tasks, then submit for instant results.
| Input | Why it matters | Output |
|---|---|---|
| CPU model & cores | Shows processing headroom for game logic and threads | Utilization target, upgrade advice |
| GPU name & VRAM | Determines graphical throughput at chosen resolution | Estimated FPS, workload share |
| RAM & speed | Affects load times and smoothness in CPU‑heavy tasks | Memory recommendations |
Understanding the Calculator’s Percentage and Severity
Think of the score as a quick snapshot that shows which component limits smooth play. The percent output turns telemetry into a simple health meter for system performance and helps you pick fixes fast.
What 0-5%, 5-10%, 10-50%, and 50%+ mean for your build
0–5% — Well-balanced. Expect steady fps, solid 1% lows, and little tuning required.
5–10% — Minor. Occasional hitching under heavy scenes; simple setting tweaks often help.
10–50% — Significant. A clear bottleneck occurs; plan targeted upgrades or reduce detail to regain headroom.
50%+ — Critical. One part is severely limiting performance and you should upgrade urgently for better play.
Translating scores into smoothness, 1% lows, and stutter risk
The health meters show whether the cpu or gpu drags your build. At 1440p a GPU-bound result is common. In CPU‑heavy games like sandbox titles, the cpu often causes low frame spikes.
- Use the results to prioritize fixes before buying parts.
- Better 1% lows mean fewer micro‑stutters and a more consistent feel.
- Match your goal FPS to the score — higher targets need more headroom.
RTX 3060 Ti Scenarios: When a Bottleneck Occurs
Switching display targets and workloads often flips which component limits smooth play. That shift matters for anyone tuning a build for specific tasks.
1080p esports CPU limits vs. 1440p/4K GPU limits
At 1080p with high refresh targets, the cpu can cap FPS while the gpu sits underused.
This is common in fast-paced esports titles where game logic and frame pacing demand many CPU cycles. Pairing a modest processor with a 240 Hz goal often causes a cpu bottleneck.
Move to 1440p or 4K and the load shifts. The GPU then takes the lead, and frame rates hinge on graphics throughput.
Ray tracing on 3060 Ti: settings that flip the bottleneck
Enabling ray tracing or heavy lighting instantly raises GPU work. That flip eases CPU pressure and can expose a gpu bottleneck.
“Try toggling RT and use the gpu bottleneck calculator view to see utilization and estimated FPS changes.”
Video editing and creator workloads: CPU cores, RAM, and NVMe
For video editing, more CPU cores and fast RAM speed up renders and timeline scrubbing. Cinebench shows clear core scaling for exports.
NVMe drives cut loading and texture streaming hitches, so you often keep GPU hardware while improving storage and processor for smoother performance.
- Some strategy or sim titles remain CPU‑heavy; AAA games with effects hit the GPU harder.
- Use the tool to preview how tasks and screen resolution change which components need attention.
- Optimize before upgrading—small tweaks often raise practical frame rates.
Inputs That Change Results: Resolution, Task Type, and Detail Level
A single dropdown change can move stress from the processor to the graphics card and alter the advice you get.
Pick a resolution (1080p, 1440p, or 4K) and watch the tool shift utilization and the predicted performance in real time.

Choosing different tasks — fast-paced gaming, streaming, or editing — highlights which components need more headroom.
Higher detail levels push the gpu and add visual load, while draw distance and simulation complexity raise the cpu work.
- Minor input tweaks can change the results and the suggested optimizations immediately.
- Use presets to compare high-refresh esports goals versus cinematic single‑player targets.
- RAM speed and storage can tilt perceived bottlenecks under certain workloads.
“Re-run checks after driver updates or major game patches to keep your plan current.”
Use the calculator output to build a settings plan that fits your favorite titles. Recheck after OS or driver patches — bottlenecks evolve with updates and new releases.
How to Use Advanced Options for Accurate, Game‑Ready Insights
Use the advanced panel to simulate in-game options so you know which setting will free up headroom before you test it live.
Advanced toggles let the tool recalculate workload share, headroom, and estimated fps when you change resolution, quality, or upscaling. This helps you build a settings plan that mirrors real play.
DLSS/FSR upscaling to relieve the GPU at higher resolutions
Enable DLSS or FSR to lower native render cost and boost performance. Upscaling reduces GPU load and often raises 1% lows at 1440p and 4K.
Try quality vs. performance modes to find the best visual trade-off for your target fps.
Target FPS, ray tracing toggles, and quality presets
Set a target fps to see what headroom you need for smooth gameplay. Toggle ray tracing to preview its heavy GPU cost.
Run presets (Low, Medium, High) to compare how many graphical features shift load between the cpu and gpu.
Safe overclock multipliers for CPU and GPU headroom
Use modest OC multipliers in the tool to simulate real gains. The panel shows estimated fps and utilization changes so you can judge benefits before physically overclocking.
Validate any OC with stress tests and temp monitoring. Make one change at a time to track its effect on performance and the reported bottleneck.
“Treat the advanced panel like an in-game graphics menu — tweak, test, and repeat until visuals and performance match your goals.”
Diagnose in the Wild: Monitoring and Benchmarking Your System
Before swapping parts, collect live performance data to know what truly limits your rig. Start with on-screen overlays and logs so you can match symptoms in play to clear metrics.
MSI Afterburner is your go-to for real-time cpu and gpu utilization, temps, and frametime graphs. Use the overlay while you play to see if one component stays maxed and the other idles.
Run HWMonitor alongside it to check voltages and thermal limits. Thermal throttling or voltage drops can mimic a bottleneck and mislead upgrades.
Use synthetic tests to stress single parts
Launch 3DMark (Time Spy or Fire Strike) to measure GPU health and compare scores to similar systems. Run Cinebench R23 to test CPU multi-core and single-thread strength relevant to many games.
“Update drivers before benchmarking so results reflect current stability and speed.”
- Track overlays to spot real-time cpu and gpu usage and frametime spikes.
- Check HWMonitor for temps and voltages that suggest thermal limits.
- Compare 3DMark and Cinebench scores with your calculator estimates to validate findings.
- Repeat tests after changes and keep screenshots to build useful data over time.
Use the collected data to decide if issues are settings, drivers, cooling, or a genuine hardware limit. Small fixes often restore smooth performance without a major part swap.
Reading the Output: Bottleneck Component, Utilization, and Headroom
Begin with the component summary — it flags the part creating the most strain in your system. That single line shows the bottleneck and its severity so you know whether to tweak settings or plan an upgrade.
CPU- and GPU-bound clues from workload share and estimated FPS
Read utilization first. A pegged cpu with a relaxed gpu points to a CPU-bound result; the reverse signals a GPU-bound case.
Next, check workload share and headroom. Workload share shows how much each part handles under the chosen scenario. Headroom reveals how close parts are to thermal or utilization limits and guides safe tuning.
“Start with the component line, then confirm with live monitoring to make sure the numbers match what you feel in games.”
- Compare estimated fps and frame rates for CPU vs. GPU to see which side caps targets.
- Note the percentage and severity to decide between quick tweaks or upgrades.
- Re-run after resolution or RT changes; the limiting part can shift sides.
- Save the results card for A/B comparisons while you optimize.
| Output | What it shows | Action |
|---|---|---|
| Bottleneck component | Which part limits system performance | Tweak settings or plan upgrade |
| Utilization & workload share | Load split between cpu and gpu | Adjust quality, enable upscaling, monitor temps |
| Headroom & estimated FPS | How close parts are to limits and predicted frame rates | Set safe OC or lower demanding features |
Optimize Without Upgrading: Fast Fixes for Performance Issues
Small configuration changes often unlock big gains without spending on new parts.
Start with the basics: free up CPU cycles by closing browsers, chat clients, and recording tools before you start gaming. Update GPU drivers and the chipset firmware to get stability and speed fixes.
Enable XMP or EXPO so RAM runs at rated speed. That helps low frame and responsiveness in CPU‑heavy scenes.
- Clean dust and improve airflow to stop thermal throttling on the cpu or gpu.
- Lower CPU‑bound settings: draw distance, crowd density, and terrain LOD.
- Reduce GPU hits: shadows, reflections, ray tracing, and heavy post effects.
- Use DLSS/FSR or resolution scaling to lift fps while keeping image quality.
Use the tool outputs to rank which components or settings to tune first. Re-test after each change to measure gains for low frame rates or stutter.
“Fix small software and cooling issues first—many perceived hardware faults are just configuration factors.”
| Fix | Why it helps | When to use |
|---|---|---|
| Close background apps | Frees CPU cycles and RAM | Before gaming sessions |
| Update drivers & BIOS | Unlocks optimizations and stability | After major patches or crashes |
| Enable XMP/EXPO | Improves minimums and responsiveness | When RAM runs at JEDEC speeds |
| Adjust graphics settings | Reduces GPU load and improves fps | If a gpu bottleneck limits targets |
Upgrade Suggestions When One Component Holds You Back
When one part clearly limits frame rates, a targeted upgrade can restore balance fast.
Choosing the right CPU for a 3060 Ti at 1080p/1440p
If your goal is high-refresh 1080p esports, favor single-thread speed. A faster cpu raises frame ceilings and reduces input lag.
For 1440p or cinematic play, the gpu usually carries more load. In that case a mid‑high tier cpu is enough and you can focus elsewhere.
When to keep the GPU and upgrade CPU, RAM, or storage first
Keep gpu when the results show the graphics card is the stronger part. Instead, upgrade memory or storage to gain smoother minimums and fewer stalls.
- Increase RAM to 16–32GB in dual‑channel and pick faster kits to improve 1% lows and multitasking.
- Move from HDD to NVMe SSD to cut load times and reduce streaming hitches in modern titles.
- Address a cpu bottleneck first with a processing unit that matches your motherboard and cooling.
- Match upgrades to tasks: video work needs more cores and RAM; streaming may need both CPU and storage.
| Upgrade | Why it helps | When to choose it |
|---|---|---|
| CPU | Raises single‑thread and multi‑core performance | High‑refresh 1080p or clear cpu bottleneck |
| RAM | Improves stability, 1% lows, and multitasking | Under 16GB, single‑channel, or slow kits |
| NVMe SSD | Reduces load times and texture stutters | HDD users or slow installs |
Plan upgrades with PSU headroom and BIOS support in mind. Use the tool output and severity to decide between incremental fixes or a full platform refresh. Avoid overbuying a powerful gpu if the rest of your builds cannot feed it.
Balance Your Build: Use CPU‑GPU Pairing and Comparison Tools
A balanced pairing keeps each component working efficiently so you get smooth play without wasting money. Use advanced interfaces to compare CPUs and GPUs with filters for workload type and resolution.
Find a CPU for my GPU and Find a GPU for my CPU modes shortlist parts that match your goals. They factor cores, threads, VRAM, memory bandwidth, and ray tracing support to project real performance.
Compare CPUs and GPUs: cores, threads, VRAM, bandwidth, and RT
Use the tool to run side‑by‑side comparisons. Filter by resolution and workload to see how pairings change between esports and cinematic titles.
- Use “Find CPU for my GPU” to shortlist processors that won’t limit your graphics card.
- Use “Find GPU for my CPU” to pick a card that matches your processor’s strengths.
- Compare cores, threads, VRAM, bandwidth, and RT support to predict overall performance.
- Check projections and recommendations so upgrades actually improve system performance.
“Preview bottleneck risk and frame‑rate projections before you buy to avoid mismatched upgrades.”
Validate choices against budget, PSU, and case thermals. Aim for a balanced system that meets your target FPS and has room to grow.
Thermals, Power, and Storage: The Overlooked Bottlenecks
Many real-world performance problems trace back to cooling, power delivery, or where your games sit on disk.
Airflow and coolers to prevent thermal throttling
Keep fans and filters clean and set smart fan curves. Quality coolers and balanced intake/exhaust stop the cpu and gpu from down‑clocking under load.
Monitor temps under stress. If clocks fall during gameplay, thermal throttling is causing the low frame feel.
PSU headroom and efficiency for stability under load
Pick a supply with 80+ Bronze or Gold efficiency and leave 100–200W headroom for spikes and future upgrades.
Stable voltage prevents crashes and odd slowdowns that look like a hardware problem in other components.
NVMe vs. HDD: load times, texture streaming, and hitching
Move OS and games to an NVMe SSD to cut load times and reduce texture streaming hitches. Keep drives under ~80% full to maintain speed and longevity.
Use monitoring data and re-run the calculator after fixes — many perceived bottleneck issues vanish once cooling, power, and storage are addressed.
| Area | Why it matters | Quick action |
|---|---|---|
| Cooling | Prevents thermal throttling on CPU/GPU | Clean filters, adjust fans, upgrade cooler |
| Power | Stable delivery avoids crashes and dips | Use 80+ PSU, keep 100–200W headroom |
| Storage | Affects load times and texture streaming | Install OS/games on NVMe, keep |
| Validation | Confirms fixes reduced limits | Record temps, voltages, and frame data while testing |
Real‑Life Wins: From Low Frame Rates to Balanced System Performance
Real users report dramatic gains after simple, targeted fixes that unlock steady fps and smoother play.
CPU upgrades often deliver the biggest single jump. One user moved from a Ryzen 5 2600 to a 5600X and saw much higher fps and far better 1% lows with a high‑end graphics card.
Storage fixes matter too. Switching Flight Simulator from an HDD to an NVMe SSD removed long loads and stopped streaming hitching in demanding scenes.
Memory upgrades also help. Moving from 8GB to 16–32GB, and enabling faster RAM, stabilized both gaming and video editing timelines.
Thermals are an easy win. An aftermarket cooler fixed CPU throttling for many builds and made frame rates consistent under long sessions.
“Use the calculator and tool estimates before and after changes to validate gains.”
| Change | Result | When to apply |
|---|---|---|
| CPU upgrade (e.g., 2600 → 5600X) | Higher fps, improved 1% lows | High‑refresh gaming or CPU‑heavy titles |
| HDD → NVMe | Faster loads, no streaming hitching | Open‑world or sim games |
| 8GB → 16–32GB RAM | Stable multitasking, better frame rates | Gaming + streaming or video editing |
| Aftermarket cooler | Stops thermal drops, steady clocks | High temps or stock coolers under load |
Key takeaway: small, targeted upgrades often beat a full rebuild. Track fps and frame rates to quantify real wins and focus on the true limiting part of your system.
Common Myths and Objections About Bottleneck Calculators
A raw percentage can feel useless until you see what was tested. Good tools pair a score with the game, resolution, and workload so the number points you to the right fix.
“Percentages are useless” and why context matters
Percentages are a starting point, not a verdict. When tied to specific settings they help you prioritize changes and decide if a swap or a tweak is best.
Use results alongside live data from monitoring tools to confirm whether the cpu or gpu is hitting limits. A small score is fine if you already meet your FPS goal.
Beyond CPU/GPU: factoring RAM, drivers, and thermals
Top calculators account for RAM speed, storage streaming, and case airflow. Background apps and old drivers skew results, so test with a clean system for accurate data.
“Transparent outputs — utilization, headroom, and severity — beat a single number every time.”
- Percentages need workload and resolution to be useful.
- Tools that include RAM, storage, and thermals give better guidance.
- Confirm results with monitoring and benchmarks before upgrading components.
Make It Routine: Integrate Bottleneck Analysis into PC Maintenance
Keep performance predictable by adding quick checks to your maintenance habit. A short routine protects your system as parts age and game engines evolve.
Seasonal checks, new releases, and component aging
Run periodic scans. Schedule seasonal runs of the bottleneck calculator whenever you update drivers or BIOS.
Re-test after major game launches. New titles can change shader behavior and shift loads between cpu and gpu.

- Monitor temps and utilization over time to spot failing fans, dry paste, or dust buildup.
- Keep a simple log of settings, scores, and changes to track component aging and fixes.
- Use quick tasks—firmware updates, storage trims, and driver installs—to restore responsiveness.
- Validate results with 3DMark and Cinebench to catch regressions and confirm real gains.
- For gaming, revisit settings when you change genres or resolutions to prevent hidden bottlenecks.
“Make small improvements routine—cleaning and cable management preserve performance and extend builds.”
| Task | When | Why |
|---|---|---|
| Run bottleneck calculator | Seasonal / after drivers | Spot shifts in workload and headroom |
| Benchmark (3DMark/Cinebench) | After hardware or software changes | Validate improvements and catch regressions |
| Health check (CPU & GPU) | Quarterly | Preempt failures and reduce downtime |
Conclusion
Wrap up by applying the guided settings, then re-run the tool to confirm gains.
strong, actionable results come from clear outputs: utilization, headroom, and estimated FPS that show which component limits your system performance.
Small fixes—cleaning fans, enabling XMP, updating drivers, or toggling DLSS/FSR—often remove common bottlenecks before any upgrade is needed.
Use the comparison and pairing modes to plan cost‑effective upgrade suggestions that keep your RTX 3060 balanced with the right CPU and memory for your gaming goals.
Save each result card, track changes over time, and repeat scans after tweaks. With this process and the right tool, your graphics card and cpu will deliver the performance you expect.
FAQ
What does a bottleneck mean for an RTX 3060 Ti system?
How do I quickly check my system specs to use the tool?
What do the percentage ranges mean in the results?
When is the CPU usually the limit versus the GPU?
Can ray tracing make the GPU the bottleneck on this card?
How do resolution and detail settings change bottleneck results?
What advanced options should I use for accurate, game‑ready advice?
Which monitoring tools help verify the calculator’s prediction?
What quick fixes can improve performance without buying new hardware?
When should I upgrade the CPU instead of the GPU?
How do thermals and PSU quality affect perceived bottlenecks?
Is percentage output the only thing I should trust in a bottleneck tool?
How often should I recheck my system for new bottlenecks?

Follow Gill for the latest tips on CPU/GPU balance, PC upgrade guides, and hardware troubleshooting.Gill is the founder of PC Bottleneck Calculator, a free online tool designed to help users identify and fix performance issues in their PC builds. With years of hands-on experience in computer hardware and system optimization, Gill is passionate about making complex tech concepts simple and accessible for everyone—from beginners to gamers and PC builders. His mission is to help users get the most out of their systems through smart analysis and expert insights.
Follow Gill for the latest tips on CPU/GPU balance, PC upgrade guides, and hardware troubleshooting.
- NVIDIA RTX 6000 Ada Generation 48 GB Bottleneck Calculation - October 17, 2025
- Optimize Your GeForce RTX 5070 Performance with Our Bottleneck Tool - October 2, 2025
- GeForce RTX 5090 Bottleneck Calculator: Optimize Your Setup - October 1, 2025